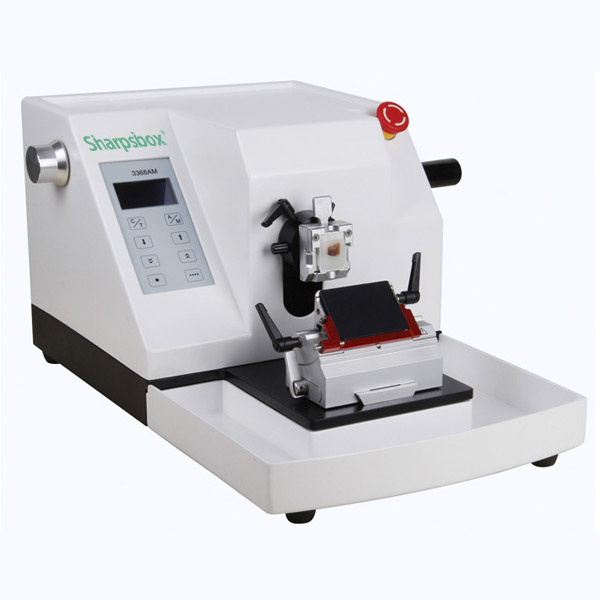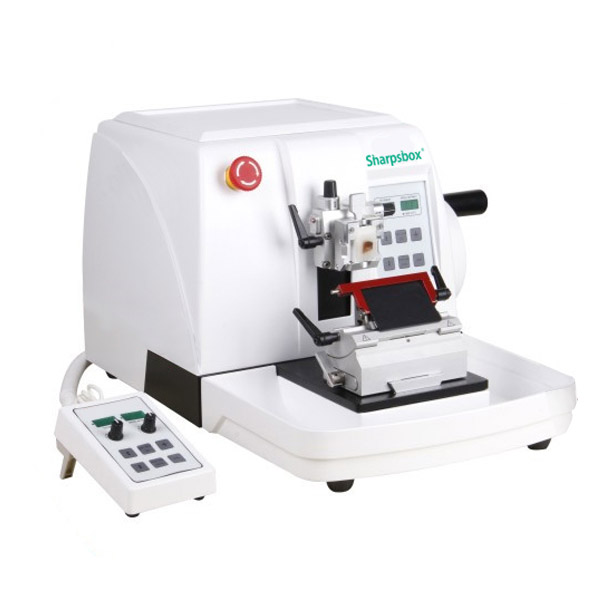
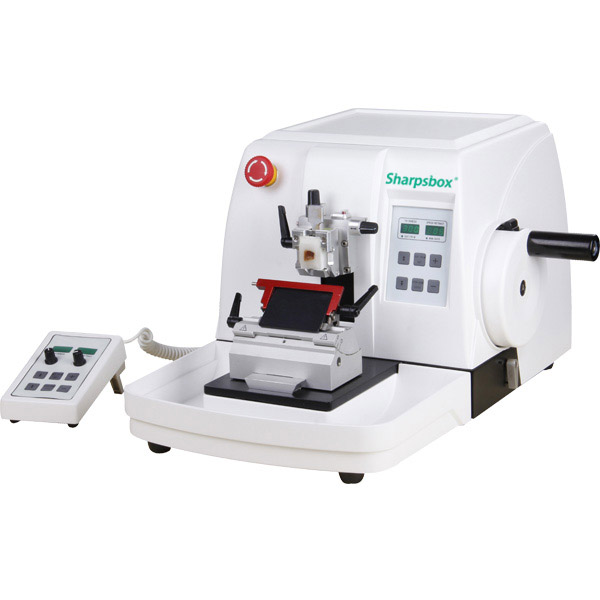
'SharpsBox' #DHM3398 model Luxury Fully Automated Rotary Microtome is more comfortable for operating.
Description
Standard unit for paraffin sections and research, plastic and industrial applications. The fully motorised unit offers an even greater comfort than manual and semi-automatic microtomes whilst retaining all essential features of this series. The modular design allows custom-made assemblies from a broad range of accessories.
Features
The 'SharpsBox' #DHM3398 model fully automatic Microtome provides utmost reliability, user benefit and outstanding operator comfort. The high section stability and precision turn this instrument into an universal multipurpose microtome for highest demands on sectioning paraffin as well as for hard sectioning technique in biology, medicine and industry. The cutting motor drive allows precise sectioning, ensuring good reproducibility. Another user-friendly feature is the cutting window that can be adjusted to the specimen size, while the preselected speed is only applied within the cutting window. This enables the user to section delicate specimens precisely in a short period of time. The large section thickness range from 0.25 µm to 100 µm is divided into fine sectioning and trim sectioning. You can easily switch between these two ranges, even while sectioning. Memory positioning allows the fast movement to a stored cutting position by pushing one button only.
■ The machine adopts streamline design, advanced functions, stable and reliable performance, and easy to use.
The transmission feeding system is controlled by intelligent program, which can quickly switch between manual and electric intelligent slicing, and the automatic slicing speed can be adjusted
■ Advanced imported drive system with trimming, slicing, fast-forward, fast-rewind, and conversion functions
■ Adopt imported cross ball guides and screw motion system to ensure the matching accuracy and the slicing effect is more ideal
■ LCD display slice thickness, trimming thickness, slice count
■ Slicing and trimming are done through the control system and can be switched arbitrarily
There are two modes of automatic slicing: inching and continuous slicing, and the automatic slicing speed is continuously adjustable
■ With safety emergency braking system, safety alarm system, drive overload protection, automatic sleep protection
■ Quick and convenient interchangeable specimen chuck (optional for wax block chuck and embedding box chuck)
■ Handwheel balance and fine adjustment system, lock at any position to ensure the safety of the slicing process
The knife holder can be adjusted by moving laterally, no need to move the blade by hand, and the full length of the blade can be used (slicing in three parts)
The blade holder is equipped with a red blade guard to cover the full length of the blade to protect the user safely, and the pusher is easy to replace the blade
■ Handwheel balance and fine adjustment system, can be locked at any position to ensure the safety and convenience of the slicing process
■ Large-capacity and easy-to-remove waste trough, the top of the cover can store tools such as disposable blades
#DHM3398 model Premium Fully Automated Rotary Microtome Parameter
| * Section Thickness Setting Range: 0.25—100μm 0.25—2.5μm increment 0.25μm 2.5—5μm increment 0.5μm 5.0—10μm increment 1μm 10—30μm increment 2μm 30—60μm increment 5μm 60—100μm increment 10μm |
| * Trimming Thickness Setting Range: 1—600μm 1—10μm increment 1μm 10—020μm increment 2μm 20—050μm increment 5μm 50—150μm increment 10μm 150—600μm increment 50μm |
| * Retraction Setting Range: 0—50μm (0 is off) 5-10-15—50 (optional) * Minimum Setting of Sectioning Thickness: 0.25μm * Horizontal Feed: 28mm * Vertical Specimen Stroke: 70mm * Specimen Holder Rotation: at any angle within360 degrees * Movement Range of the Base of BladeHolder Base: 0-60mm (front to back) * Movement Range of the Blade Press plate: 0-23mm * Specimen Clamp Rotation:at any angle within 360 degrees * Specimen Orientation:XY – 8° * Maximum Specimen Size:70×70mm * Feed speed adjust: 1500μm/s ~ 3500μm/s * Precision Error: ±1% * Working Voltage:AC 220V±10% 50Hz (standard model); AC110V±10% 60Hz * Power: 150W * Dimensions: 580× 475× 340mm(W×D×H) * Net Weight: 41kg |


Microtome Slice operation technology_Pathological examination technology
(1) Microtome Slicer
The microtome is a special equipment for making tissue slices, which can cut various tissue blocks into thin and uniform tissue slices that can be observed under a microscope.
1. Type of slicer
(1) Paraffin microtome: According to its structure, it can be divided into rotary type, shaking type, sliding type and push type (sled type). The most commonly used is the rotary microtome, which moves the wax block with the embedded tissue up and down by rotating the hand wheel, and at the same time pushes it in the direction of the slicing knife for slicing. The advancing distance can be adjusted with a scale adjuster as required, and the cutting angle of the slicing knife can also be adjusted. The conventional slice thickness is 3-5 μm. This kind of microtome is heavy and stable, it is very suitable for cutting paraffin sections, and it can be ideal for continuous sectioning.
(2) Cryostat: In: any microtome with a freezing device on the main unit can become a frozen microtome, which can be divided into two types: open type and constant cooling box type according to whether the temperature is constant or not. The former replaces the tissue block support table with a rapid freezing device (liquid CO 2 refrigeration device or semiconductor refrigeration device), because the temperature is not easy to control, the slicing technique is difficult, the slice thickness is 8~15 μm, and it is not easy to slice continuously, and it is rarely used at present. The latter places the rotary slicer in a low-temperature airtight freezer at -30°C, and uses the compressor to circulate and cool the refrigerant. It is not affected by the external temperature and environment during slicing, and can continuously cut slices of 4-8 μm. Mainstream type, mainly used for rapid pathological diagnosis and histochemistry and immunohistochemistry during surgery.
(3) Collodion slicer: The slicer used for collodion-embedded tissue slices is mostly a sliding slicer, which is characterized in that the fixture for fixing the tissue block does not move, and slices are performed by the sliding of the slicing knife. It is mostly used for slicing special tissues such as brain, eyeball, spinal cord, inner ear, etc. The slice thickness is 20-50 μm.
(4) Ultrathin microtome: It is a microtome for making ultrathin sections for transmission electron microscopy. It can cut samples embedded in various embedding agents into ultra-thin sections below 50nm with a glass knife or a diamond knife. Micro-movement of levers to provide micro-propulsion: The latter uses the small changes in length of the metal rod as it expands and contracts to provide propulsion.
2. Maintenance of the slicer The slicer is a precision instrument that must be maintained and maintained on a daily basis (including the slicer that is not frequently used). Parts should not be disassembled at will to avoid affecting the accuracy. Clean and clean in time after each use to avoid dust and organic matter Pollution, should be coated with high-quality engine oil to prevent rust.
(2) Slicing operation 1. Preparation before slicing
(1) Preparation of slicing supplies: ① Slicing knife, sharpen the slicing knife in advance or replace the disposable slicing knife. The easy way to check whether the slicing knife is sharp is to touch the blade with a hair. If it breaks when touched, it means it is sharp , You can also use a microscope to check whether the blade is flat and whether there is a gap. A non-sharp knife will cause the wax section to shrink, roll, and adjust; ② Sufficient slides and coverslips are treated with cleaning solution and 95% ethanol for backup. When putting the slide and cover glass into the cleaning solution, put them in one piece at a time, so that they do not overlap; ③ Debug the spreader and the baking machine, and the spreader water temperature is 42~45°C, The temperature of the baking sheet is about 55°C. If there is no such equipment, you can make a warm water bath, use a low-power electric furnace to heat the warm water in the enamel bowl, and use a constant temperature oven to bake the slices; ④Large and medium-sized high-quality brushes (for operating wax slices) , Marker (pencil or diamond pen, used to write numbers on glass slides), ophthalmic curved tweezers, etc.; ⑤ To prepare egg white glycerin, mix 30ml of fresh egg white with an equal amount of glycerin, stir well with a glass rod, filter paper or several layers Filter the gauze into a graduated cylinder, and place it - add 1~2 thymol crystals day and night for preservation. If necessary, evenly spread the slide as an adhesive to increase its adhesion to the wax slide and prevent the slide from falling off.
(2) Wax block preparation: trim the excess paraffin around the tissue surface of the wax block with a knife, this process is called wax trimming or trimming. The upper and lower edges of the tissue block and the wax edges on the left and right sides should be trimmed and leveled; the wax edges on the left and right sides should be 2mm, too narrow and easy to damage the tissue. Too wide will affect the subsequent exhibition; if the wax edges on both sides are not parallel , which will cause the wax band to bend during sectioning; the paraffin on the upper and lower edges of the tissue block should be kept as little as possible to reduce the tissue spacing of the wax band in successive sections. The wax slices cut in this way are band-shaped and not curved, and can be more sticky when sticking the slices, which is conducive to inspection and diagnosis; when trimming the wax blocks, be careful and small: cut off the wax edges, if the large slices are trimmed, it is easy to make the wax The broken tissue of the block is exposed. In this case, it should be re-embedded: the trimmed wax block should be cooled in cold water or placed in a refrigerator to increase the hardness and facilitate slicing.
2. Microtome Slicing process
(1) Wax block installation: Clamp the repaired and cooled wax block on the microtome holder and adjust the relevant knobs so that the cut surface of the wax block is perpendicular to the operating table.
(2) Slicing knife installation: Install the slicing knife on the slicer knife and adjust the angle. The angle between the blade and the wax block is generally 5°. After fixing, move the knife seat to make the blade contact with the wax block.
(3) Cutting and trimming the tissue block: Roughly cut the wax block with a larger feed amount (15~20um) until the largest surface of the tissue is cut out. The harder tissue or smaller tissue should be thinner; for small specimens, do not cut it. Too much, so that the remaining tissue is too small to cut out the tissue slices that can be used for diagnosis; then adjust the slice thickness to the required scale (4~6μm), and prepare for formal slices.
(4) Slicing: Hold the pen in the left hand, and rotate the runner of the microtome continuously in the right hand to cut out strips of wax strips (ie, wax strips).
(5) Spreading: refers to the process in which the paraffin section floats in warm water and unfolds naturally and smoothly under the action of surface tension after being heated. Use curved ophthalmic tweezers to gently clamp the distal end of the wax tape in the right hand, gently hold the wax tape with the brush in the left hand along the blade of the slicing knife, and place the wax slice face up in 50°C water to flatten (display the film), the water temperature is too high , will cause the tissue cells to spread; too low section folds cannot be flattened. If it is difficult to unfold the film, you can put the wax slice into 30% ethanol for initial unfolding, and let the tension of ethanol unfold the wrinkles, but the adipose tissue with low intercellular adhesion will spread out when it encounters ethanol, and cannot be used for initial unfolding with ethanol. .
(6) Sticking: refers to the process of picking up the flattened wax piece from warm water and attaching it to the glass slide. Use tweezers to gently open the continuous wax section, select a complete, no-scratch, moderately thick and uniform wax section to pick up with a glass slide. A single section should be attached to 1/3~2/3 of the slide; the sequence of sticking of serial sections is generally from left to right, and when the tissue section is small (such as gastroscope specimens), 2~3 wax strips can be glued side by side. The number must be written on the label end of the slide immediately after gluing.
(7) Baked slices: After the sticky slices are slightly dried at room temperature, they are placed in a 60°C constant temperature oven or baking oven to dry and set aside. The baking time is generally 30 to 60 minutes. Too high temperature and too long time will cause slice cells to shrink tissue antigenic loss; on the contrary (less than 20min), it is easy to de-slice.
(3) Precautions.
1. Slicer installation and placement requirements. It should be placed on the operating table 65 ~ 80cm high from the ground. The operating table must be flat and stable, there should be no debris on the bottom of the machine, and there should be enough space around the machine for users to operate. The room should be ventilated and clean.
2. Before slicing, the wax block should be frozen to increase the hardness, which is good for slicing; especially in summer when the temperature is high, the wax block becomes soft and unfavorable for slicing. It must be frozen, but the hot wax block that has just been embedded cannot be frozen immediately, otherwise the wax block will crack. , - the clip will break.
3. The slicing knife and the wax block should be fixed firmly. If the fixation is not firm, the thickness of the slice will be uneven, and transverse wrinkles will be formed on the slice; it may even crack during the slicing process. But also avoid excessive rib crushing the wax block.
4. The inclination angle of the slicing knife should be 15°~20. If the slicing angle is wrong, the wax slices cut out easily shrink and should be adjusted slowly. Once the optimal slicing angle is found, do not change it at will. When operating the slicer, the force should be even, gentle and steady, and avoid uneven or excessive force.
5. If the cut wax block is in distress, use a tissue paper about the same size as the cut surface of the wax block to be moistened and stick it on the wax block for slicing, and then put the wax block with the wax piece facing up into the water to display the film. 6. The water used for the display should be cleaned, and the wax chips floating on the water surface should be cleaned in time to avoid contamination of subsequent sections.
7. When placing the wax block on the microtome, the difficult-to-cut part of the tissue (such as the skin, the capsule of the mass, the gastrointestinal serosa, etc.) should be placed upwards, which can reduce the occurrence of tissue breakage. 8. For decalcified tissue, bone marrow and known calcified tissue, fixed cutting edge slices should be used to reduce the possibility of gaps in other positions.
9. In the case of easily dislodged tissue (such as blood clots and brain tissue, protein glycerol or polylysine-treated glass slides can be used.
10. Do not pick up the first and second wax slices when placing serial sections into hot water bleached slices, because the first two wax slices are thicker and the tissue often has cavities (visible under the microscope).
(4) Common problems and countermeasures in paraffin sections
| Problem | Cause | Solution |
| Wax Ribbon Bend | The upper and lower sides of the wax block are not parallel | Re-trimming the wax block to make the width and width parallel |
| The sharpness of the blade varies | Move the blade to the sharp edge | |
| The knife edge is not parallel to the underside of the wax block | Adjust the position of the wax block so that it is parallel to the knife edge | |
| The tissue itself varies in hardness | Trim off the waxed edges on the softer side of the tissue | |
| Sections are not connected into a wax ribbon | Wax edges are too narrow or uneven | Re-trimming the block or re-embedding |
| Slice too thick | Adjust slice thickness | |
| Slicing angle is too large | Adjust the slice angle | |
| Blunt blade | Move the blade to a sharp point or replace the blade | |
| Room temperature is too low, paraffin is too hard | Raise the room temperature or moisten the wax block with lukewarm water. Re-embedded in low melting paraffin if necessary | |
| Tissue is brittle | Dehydration, transparency, wax soaking time is too long, The temperature is too high or the tissue itself is brittle | Control the time and temperature of dehydration, transparency and wax soaking. When slicing, blow air into the wax slice with your mouth while cutting. |
| Tissue folding | The stall water temperature is low. The exhibit is not good | Appropriately increase the water temperature of the booth |
| Tissue is fragile when sectioning | The embedding wax is too hard, the temperature of the wax block is low, and the knife is dull | Adjust paraffin melting point according to ambient temperature. No need to freeze wax blocks, move blade to sharp or replace blade |
| Organizational over-processing | Wet the wax block with a brush dipped in warm water, cut a piece of newspaper with the same size as the wax block, soak it with warm water and stick it on the surface of the wax block, then quickly rotate the microtome to slice. Put the slides together with the newspapers (newspapers up, slices down) | |
| Slice longitudinal cracks, longitudinal fractures, and scratches | Blade damage, chipped | Move the knife to avoid the notch or change the blade |
| The blade is not clean | Remove debris, wax from blades | |
| There are foreign bodies in the wax block, fixative crystals in the tissue, calcification points or incomplete decalcification | Remove foreign bodies in the wax block, and filter the paraffin regularly; the tissue is fully washed with water, mercury and iodine in the early stage | |
| Slices of uneven thickness, wide and narrow, or with thick and thin bands on each slice | Slicing knife or wax block not securely fastened | Adjust each screw and tighten |
| Tissue is too hard | Use a brush dipped in warm water to soak the tissue section of the wax block to soften it and cut it evenly and slowly | |
| The inclination of the slicing knife is too large | Adjust the inclination of the slicer | |
| Slicing and Slicing Knife Adhesion | The blade is not clean | Remove debris, wax from blades |
| Ambient temperature is too high | Lower down ambient temperature | |
| Paraffin has a low melting point | Pre-cool the wax block before slicing or touch the wax block and the slicing knife with ice when slicing |
Note: The most common reasons for the difficulty in cutting paraffin sections are: first, the knife is dull or the blade is damaged; second, the adjustment screw or tightening screw of the wax block or slicing knife is not tightened, and the operator should habitually check before starting the sectioning.
Related Products